
I'm sure you've seen these all over blogland, but we decided to make our own for our booth at the fair. We spent about $40.00 on the supplies, and it took Tanner about 5 hours to build. We had to stop in between to find our dog who decided to run away...but that's beside the point. He's back safe at home.
For those of you familiar with my Things Bloggers Do series, my first post was on DIY tutorials. As you know, I like to draw on things that I do to write them. Well, congratulations....you get to read one of my DIY tutorials. I'm apologizing in advance ;)

We still need to add the chairrail trim to the top, by the way.
Some things you might need:
- 10 1'' PVC poles (depending on what size you're going for, you may want to make it a completely different size..)
- Corresponding 1'' PVC connectors (You'll know which ones and how many you need once you draw out your plans)
- 2 8' sheets of plywood or other type of wood. We used MDF, it was a little less expensive. Plywood would definitely be more sturdy, however.
- About 6 yards of fabric of your choice
- 2 large dropcloths, white sheets, or fabric of your choice for the backdrop
- Paint (We used leftover stuff we had from our cabinets)
- Frames. Vintage, thrifted, painted, whichever you like
- A drill & screws
- A jigsaw, skill saw, or other choice cutting device. (I don't recommend using a plastic knife).
- 1 8' piece of trim of your choice
Alrighty...so first you're going to put together your PVC frame. You can really do whatever you want here, but I'm going to post pictures of how we did ours. We used PVC because it needed to be portable and break down.
Step 1: Cut a hole in the box (just kidding...sorry for those of you who don't get that...)


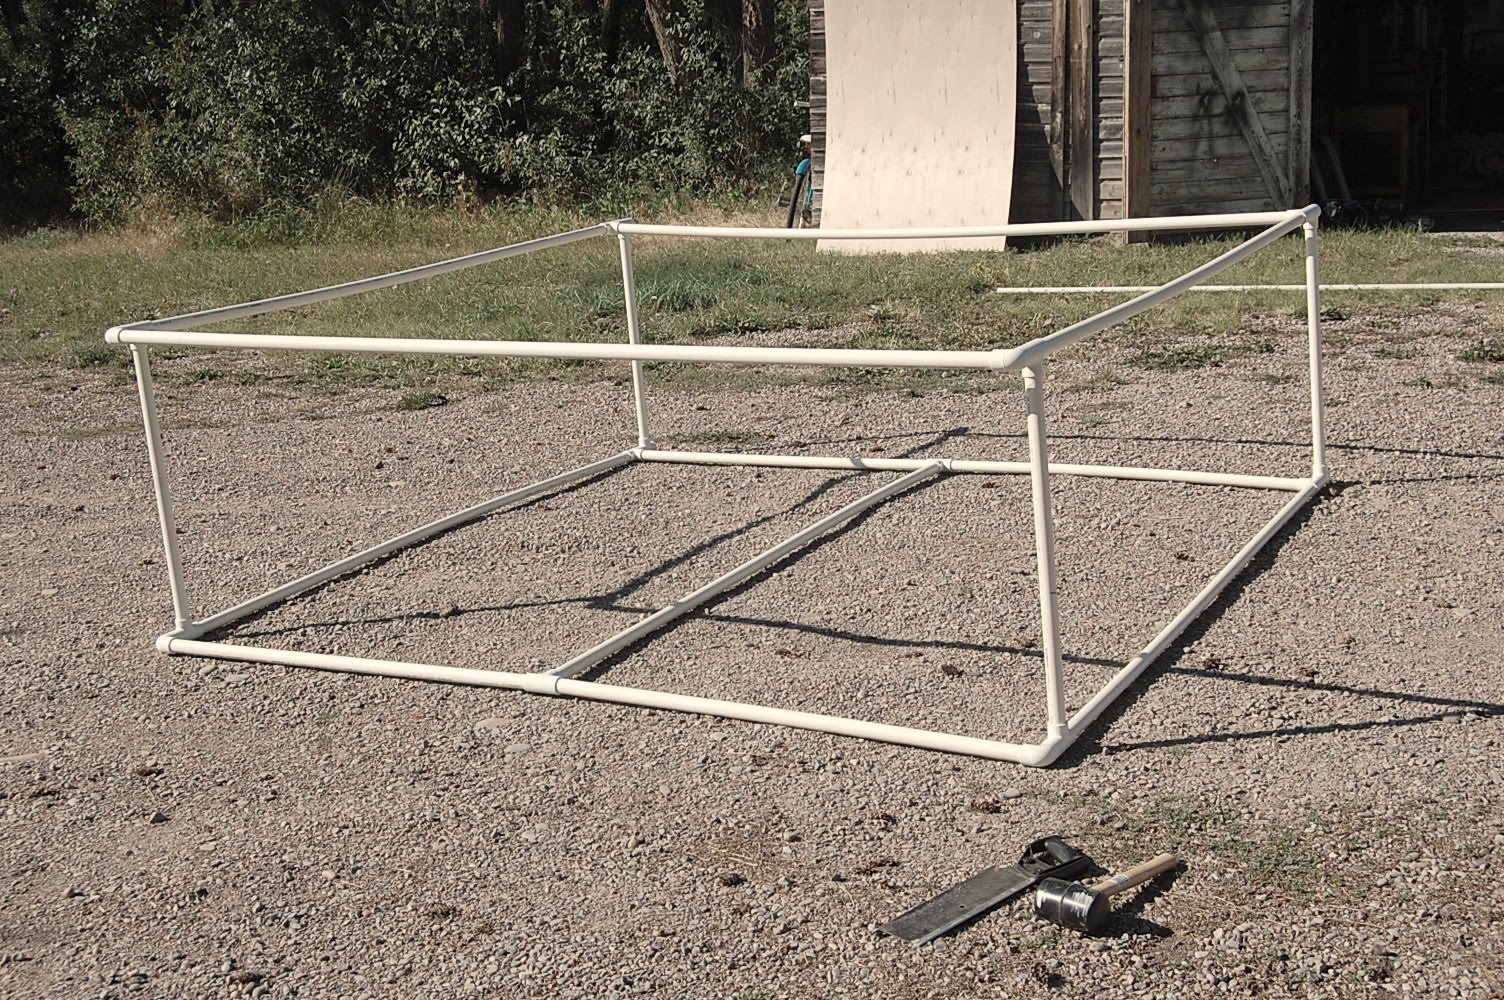


Just showing you the back side...

Once you get your frame done, stand back and marvel for a bit, and then go get your frames...

Lay the big wall down and mark out your layout for the frames. My advice is to not place too many holes above each other...so that you don't get your body in the frame below if you're trying to be in the top one. Does that make sense? "I HAVE NO WIRE!?"

You can kind of see the fabric we used...just seeing how it would lay on the wood. Trace the inner part of the frame onto the wood, and then start cutting.

Stare.........make yourself look back at the project.
What? How did that get there again...........
Anyway...next, lay your fabric out. We measured down 5' and thats where our fabric stopped and paint began. Staple it around the entire area, pulling tight to reduce wrinkles.

Trim the excess, and warm up your iron. Iron everything and really press those wrinkles out. You don't want them showing up in your pictures!

Now stir up your paint and paint the bottom..

Don't worry too much about making sure the paint line is straight, because you'll be putting a piece of trim where the paint and fabric meet.

While the paint was drying, I just had to play around with the wall..


Now its time to cut out the fabric where the holes are. Easy peezy. We used a rotary cutter..

Now put a couple screws where your picture frames will go, and hang them!

We ran into our first problem here, as we realized that we needed a solid backdrop. Stat. We hung some dropcloths and tied them to the top and bottom of the PVC frame in the back and sides. You could use sheets, different patterned fabric, whatever you wanted to use...

Tomorrow night, we will be putting the chair rail trim on, and hanging a few misc. photos on the wall to make it look more realistic. I'll make sure and post a final photo before we take it to the fair for our free photo booth! Have a super Monday. Email me if any of this is confusing..... :)


13 comments:
Time for Jana and Tanner's own Home Makeover Show! Nice job! Who else besides the two of you could have such fun making a tutorial ?!
I love it and I totally want to make one for myself... for no good reason. I think this would be great for weddings!
What a great idea - I have never seen anything like this before (apart from the saucy ones in British seaside towns). You did such a great job - love the fabric - it looks just like vintage wallpaper. You two are amazing doing all that work - great job!
~Sam
OHHH this is FUN! I LOVE it!
this is probably one of the coolest diy projects I've seen in blog world. Great job! I love it.
I seriously love this! How fun would that be at a wedding for photos of all your guests?! So great! -Kelsee
I am TOTALLY LMAO at the Step 1....!!!
We must be around the same age (and have the same humor!)
Hahaha......love that JT!
Love the Picture wall! I agree with Cole - this is THE coolest thing I have seen for awhile! Love the color choices too :) You could totally rent it out for weddings!
Excellant and Fun
That's awesome
Looks fab as does all the hot men you had working on it. Maybe next time I can just stop by & watch them work while sippin on an ice cold glass of lemonade. Aren't dreams wonderful!! LOL
Smiles,
Susie
I Heart you so much that I mentioned your FAB blog yesterday on my little old blog! ;-)
so industrious and so creative all at once!!! love!
hollie=)
This is very cool!
Post a Comment