

Isn't she wonderful? Look at that hooked nose....those glowing yellow eyes...the batting eyelashes. What a lady. What a night. And with that...I've completely gone off track to bring you this video. Might as well start your morning off right:
Replay as needed
Now that you're pumped for Tuesday, lets start this off with a little disclaimer. I had never built a 6' tall witch before last Halloween. I will tell you that there are probably much better ways to do this that we didn't think of. Some supplies will take you places you never thought you'd go. Or maybe you have, you naughty thing, you. Without further ado, I give you GERDIE.
STEP 1: The framework
We used a simple PVC frame..and really, its up to you how tall, broad, hunched over, or what you want your witch to be doing. Ours was pretty thin PVC so that it was easier to cut and work with. You'll need to buy the proper joints, which are wiht the PVC as well, just make sure that you get the right size. We
Here is a picture of her framework. We were able to follow a few tutorials online as well. I'll see if I can't scrounge up some links for you.

Obviously at this point, you won't have the head or the hands done....I apparently brought the wrong memory card to work to put the pictures on........oh ladies, I am so unprepared! :D I will post the correct pics tonight.
I bought a basic styrofoam head off of Ebay...one that had minimal characteristics but looked creepy enough to be a witch's face. I actually think it was a male mannequin face.
Step 2: Girdie's Face
MMMMK. Here's where the supplies get interesting. First you'll need stuff to make paper mache, and then you'll need a little something called liquid latex. Prepare enough beforehand, and you can get it offline. Don't, and you can go down to your local sex store and buy it there. That's where I bought it. Expect a really weird look when you say "I need some liquid latex for a Halloween project I'm working on. Enough to cover a face."
Yeah, just be prepared and order it offline. Trust me :) Or maybe....some of you have some around the house already?? haha. Oh, and another word of advice, don't leave the can sitting out when your friends come over. No matter what you say, they WILL not believe that you were just using it for the witch.
Ok, so mix up your paper mache and cover the styrofoam head with newspaper all over. Let that dry, and then do the same thing but with paper towels. Really soak those babies. Now is when you start moulding the face shapes. Obviously the nose is not already shaped like a witch's nose, so build up paper towel until you get the desired effect. It may take you a few


STEP 3: The Eyes
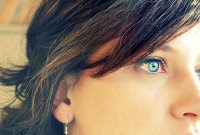
So this is something we actually just did on Sunday night haha. I wasn't satisfied with her 1-dimensional painted on eyes (though you can certainly do this, especially if you're an artist). We went to Target and found these "gummy cocktail chillers" (I found them in the Halloween candy aisle). I can't find a link to them on target.com so here's a picture from flickr of someone who got them so you know what to look for.

We used the yellow eyes because they looked a little more realistic. So Tanner took scissors and cut them down to fit to scale on the socket. We didn't dig out a hole in the styrofoam but made it look like they were inside of her head...if that makes sense haha. I used epoxy to glue the piece of eye to the socket, and then gave her some fake eyelashes. After those dried, we painted 5 coats of clear fingernail polish on the entire eye, making it look shiny and real.
STEP 4: The Hands
I actually found the original tutorial I used for these, this guy is a pro at explaining them so I'll let you read about making the hands here.
After you've made your hands, make sure and shape them how you want them to be, and paint them with the same color you used for the face. Oh, and we added long, fake fingernails and painted them black. That was a pretty cool touch.
STEP 5: Body shape
I'll be honest, we really jimmy-rigged this part haha. We took an old body pillow and poked holes in the case, put some twine through, and tied it to the top of the frame and down around her butt area. I stuffed plastic bags, trash bags, etc on top of her shoulders and taped them down with duct tape. She's a real mess under her garments :) You can use what you see fit, chicken wire and more paper mache, whatever ya wanna do.

STEP 6: Clothing
We went to the thrift store and found a black graduation gown, got some black fabric, a gross black mesh thing from Walmart, and bought a long gray wig with a witches cap. You can do what you want to on this as well. I loved this part though, easy and fun to come up with things to make her look creepy haha. I will tell you though, its easier to dress her and THEN put the hands on.
I hope this helps a bit...I know it's a ran together tutorial but leave questions you have in the comments!


Oh, here's a couple more pics of the table :) Not totally decorated yet though...


3 comments:
Hello and thank you for signing up to follow my blog! I LOVE Gerdie! You are one talented lady! Now I must look at all of your older posts... what a cute blog you have, I will visit often! Bisous... Julie Marie PS I will sign on as a follower too!
You are amazing and Gerdie is very scary. I wouldn't want her jumpin out at me. Love the table!
Hello~
thank you for visitng me. Sure looks like youve been busy scaring up some halloween fun! Have a great day.
Post a Comment